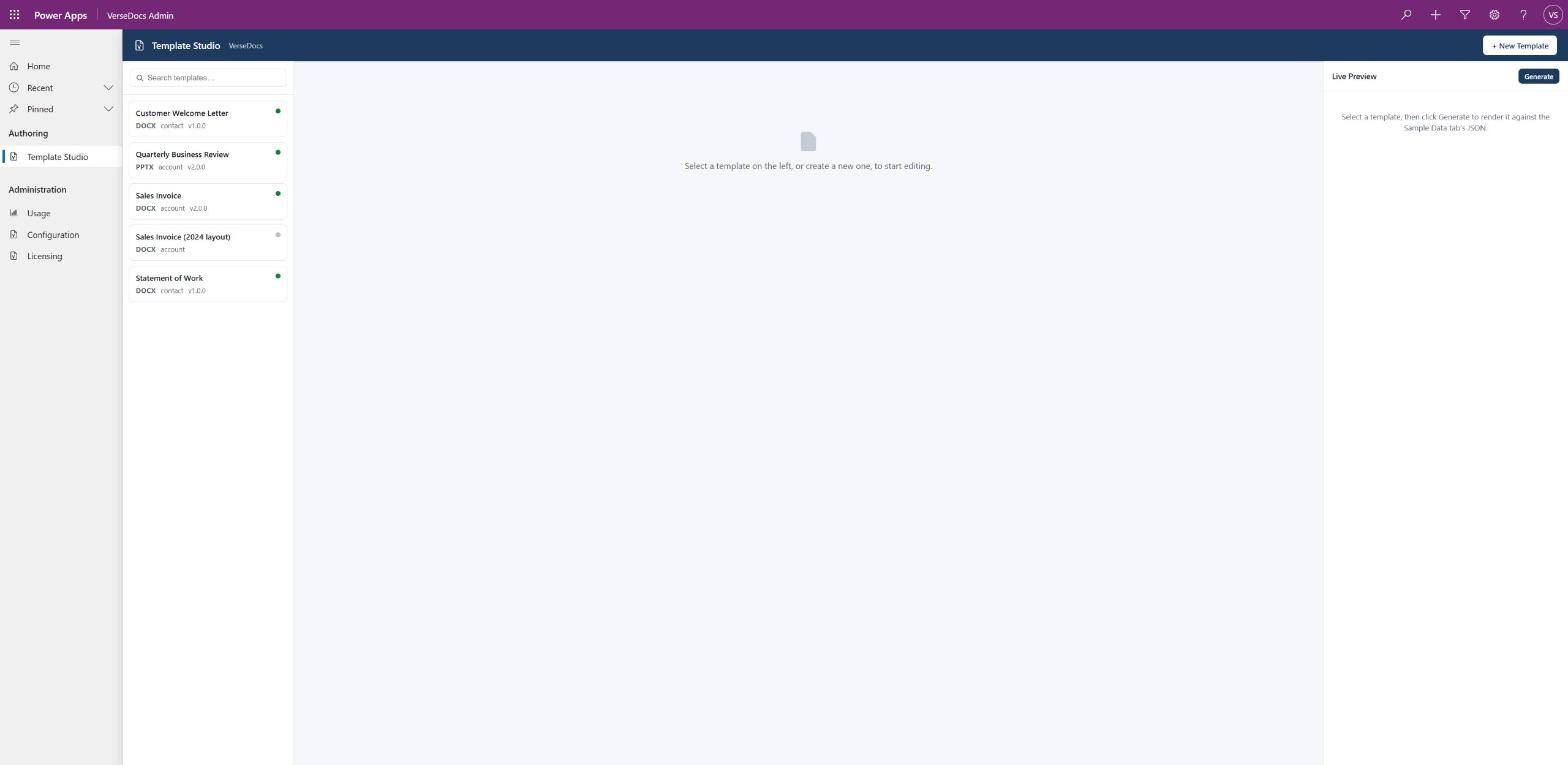
Template Studio
A single page in the admin app where you create templates, browse your real Dataverse fields, check every token against the live schema, and preview the result — without leaving the browser or typing a field name by hand.
Opening it
VerseDocs Admin → Authoring → Template Studio. Nothing to install or wire up — it ships in the managed solution.
Creating your first template
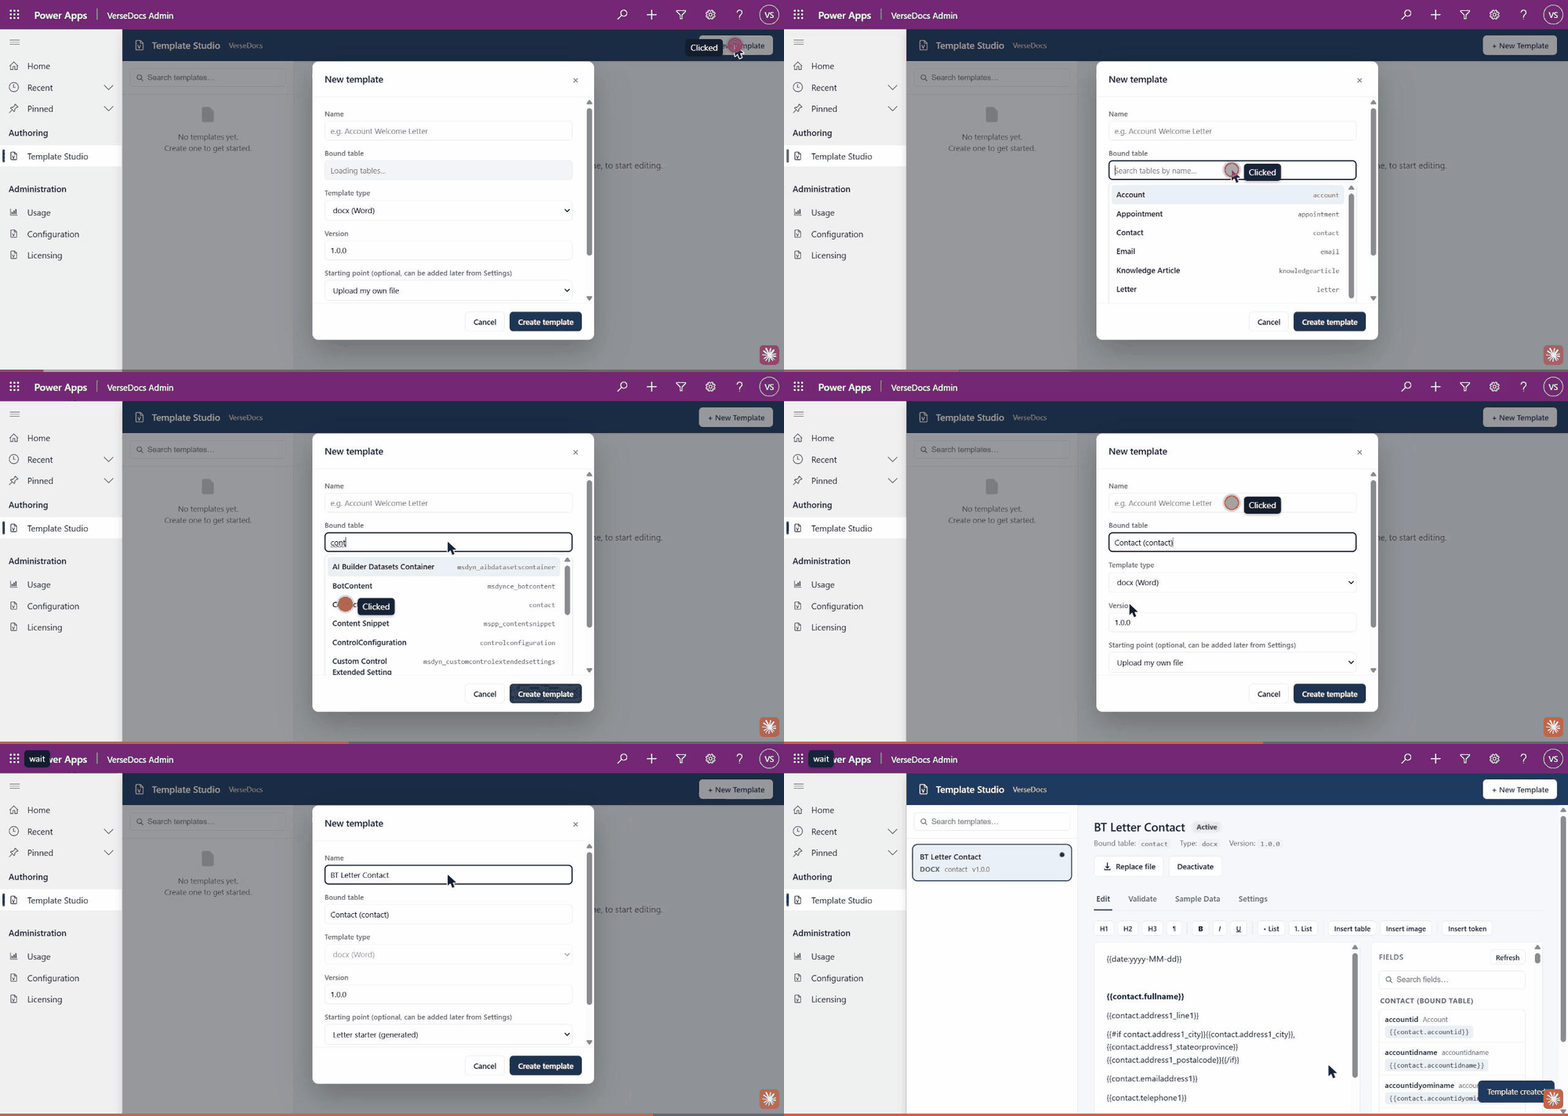
- 1Click + New Template.
- 2Give it a name, and pick the bound table — the Dataverse table this template generates documents from. The picker is searchable, and filtered to the tables that are actually yours rather than all several hundred in the environment.
- 3Pick a starter: Letter, Invoice, Quote, or Blank. A starter is a real, editable document pre-filled with tokens for fields that exist on the table you chose — not a stub.
- 4For Invoice or Quote, optionally point the line items at a real one-to-many relationship of the bound table. Choosing one writes the loop against that child table’s own fields and adds the matching relationship to the template’s data binding, so line items actually resolve when you generate.
- 5Click Create Template. The row is created and its file uploaded in one step, then the template opens for editing.
{{#each lines}} block that expects you to supply the array yourself. That is fine for a flow that passes its own JSON, but it will not populate from a record on its own.The workspace
| Tab | What it does |
|---|---|
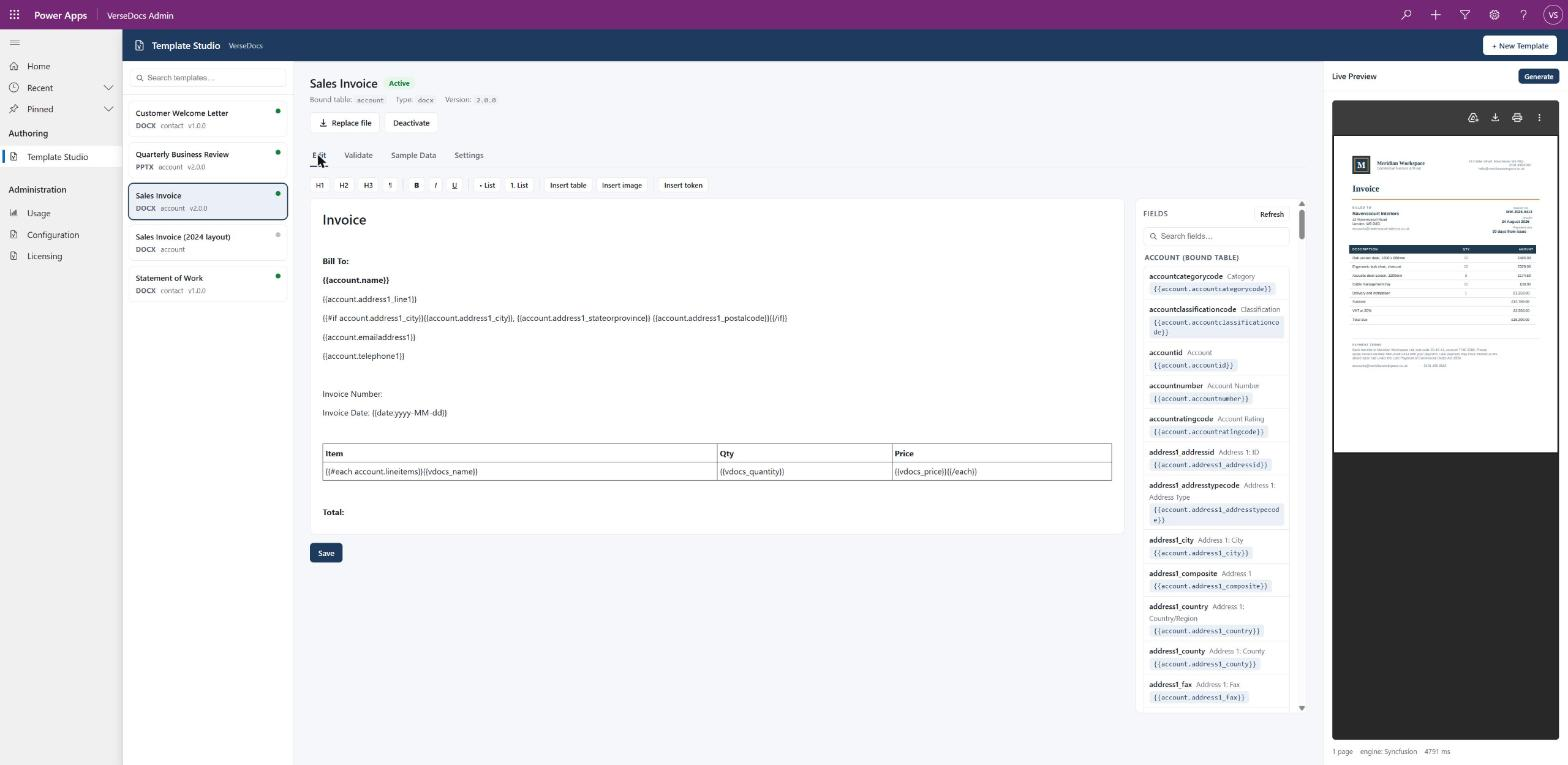
| Edit | Edit the document in the browser and insert tokens as you go. This is where a starter becomes your letter, invoice or quote. |
| Fields | Every readable field on the bound table, read live from Dataverse's own metadata, grouped and searchable, each showing the exact token to paste. Related tables the binding reaches get their own group. |
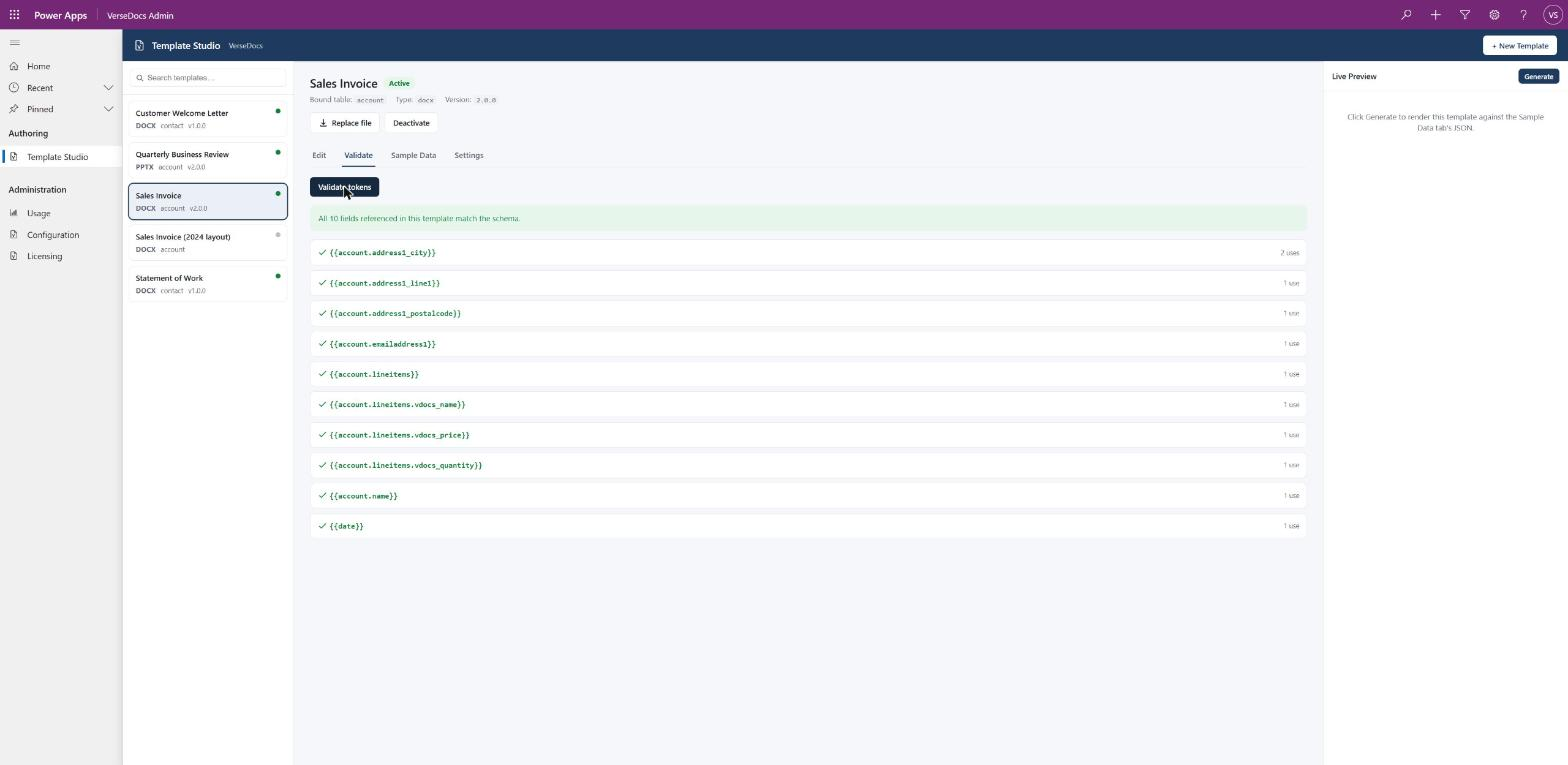
| Validate | Parses every token in the template file and checks each field reference against that same live field list. This is the highest-value tab in the Studio. |
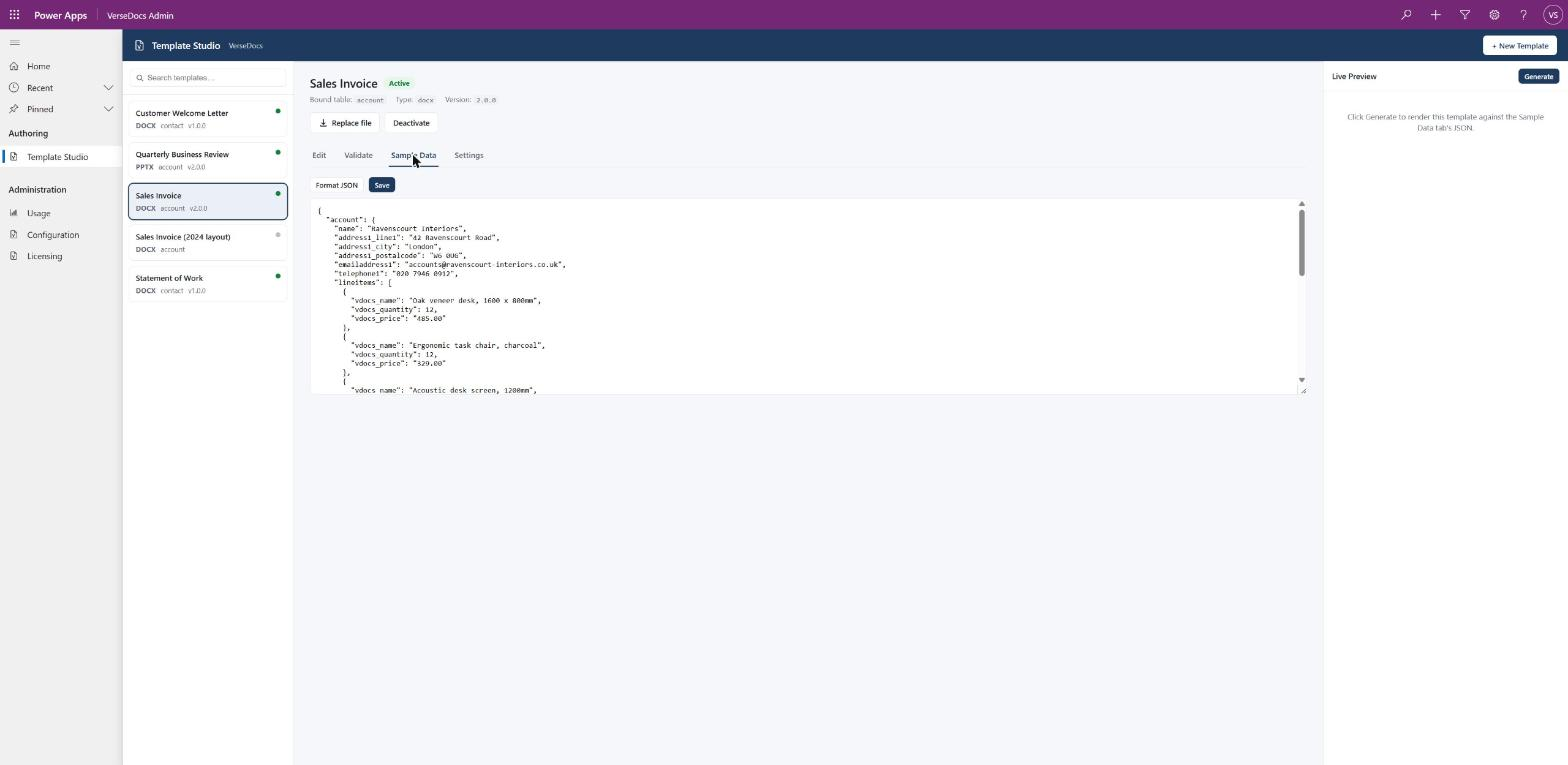
| Sample Data | The JSON used for preview. Inline “Invalid JSON” feedback rather than a silent failure, and a one-click formatter. |
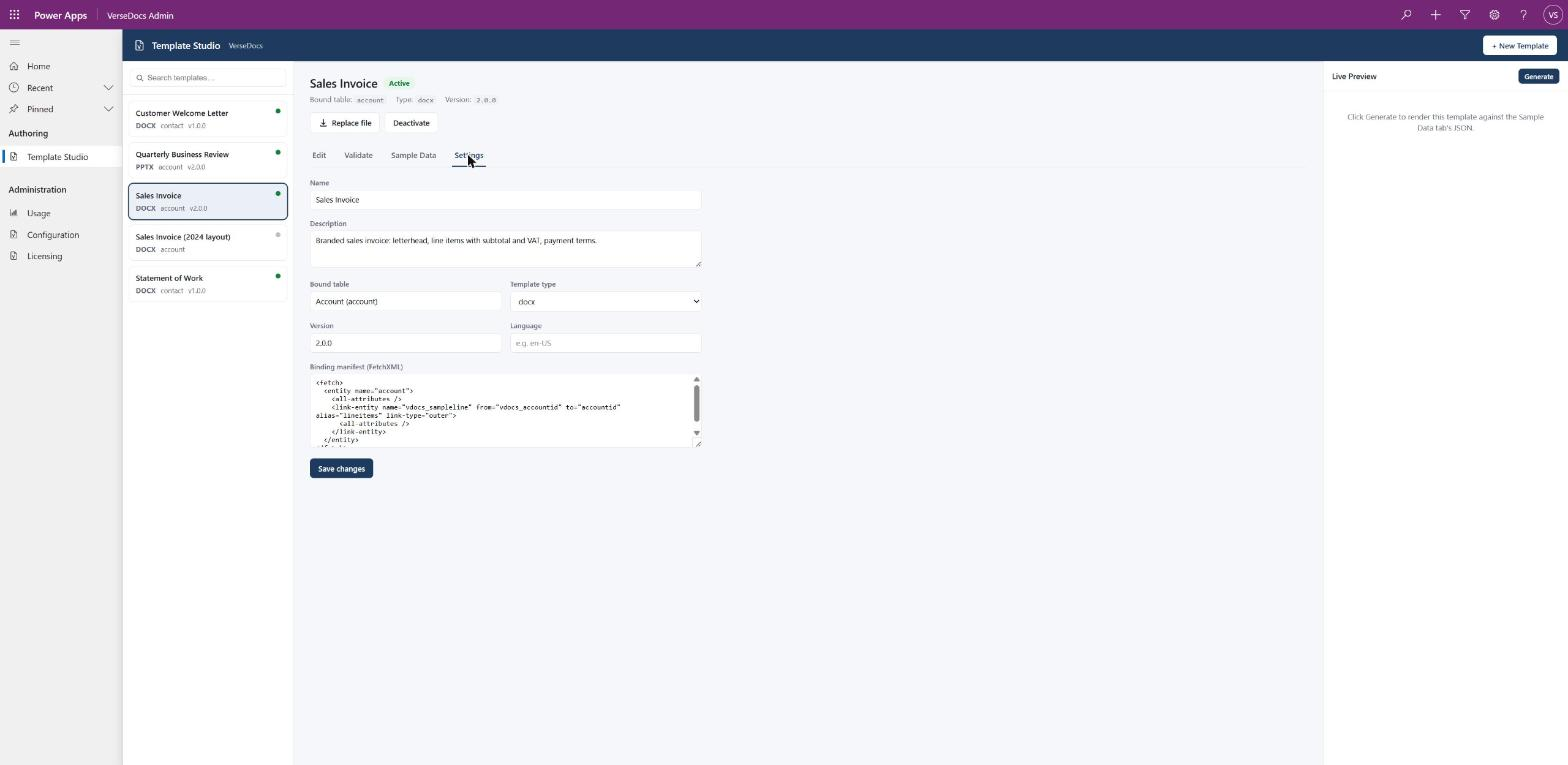
| Settings | Replace the template file, review the binding manifest (the FetchXML that decides which related records are available), and activate or deactivate the template. |
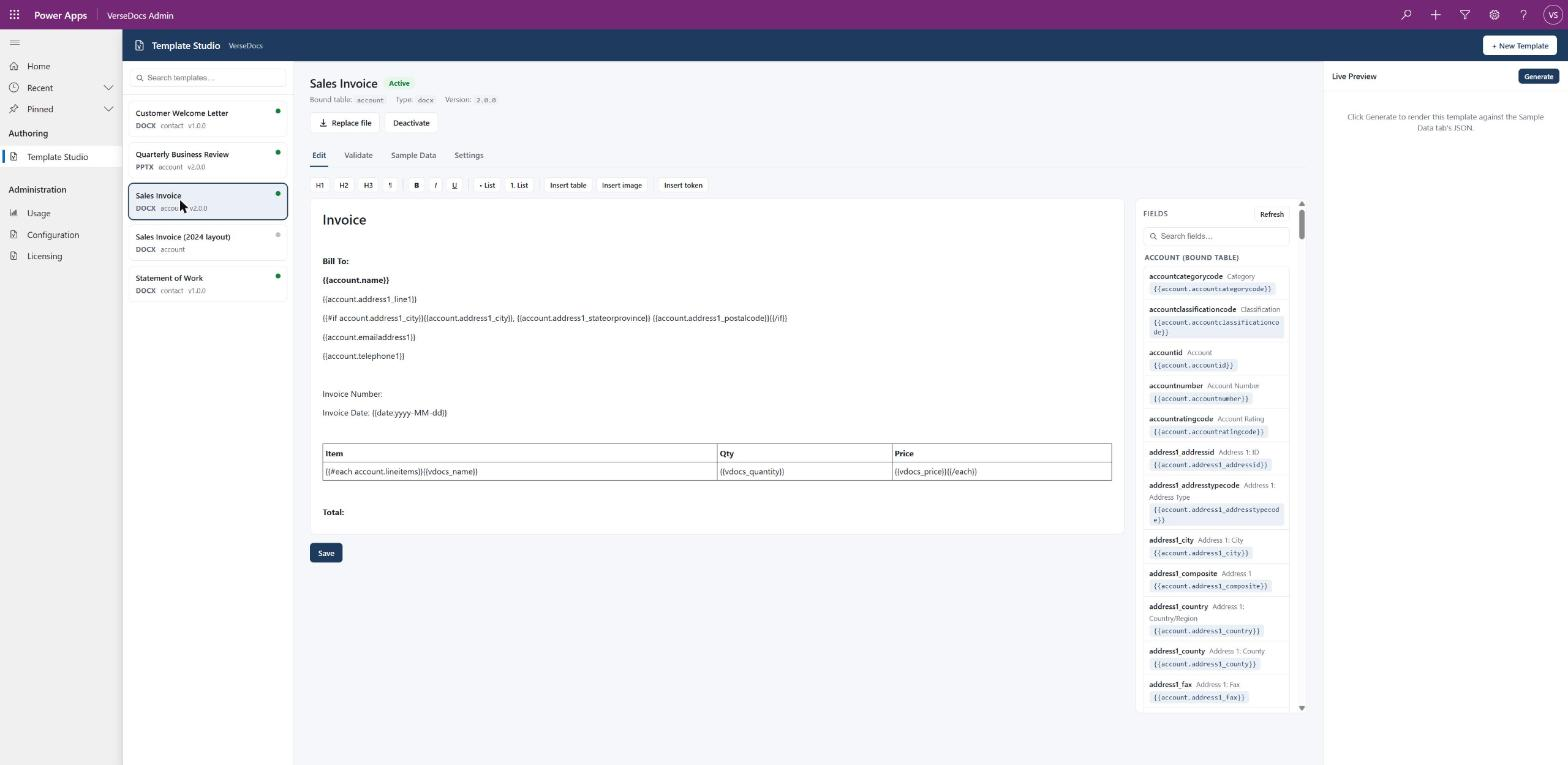
The right-hand column is a live preview, rendered through exactly the same actions a flow would call. Word templates render as an inline PDF; Excel and PowerPoint templates render natively with a download.
Token validation
The Validate tab catches the mistake that would otherwise surface as a TEMPLATE_FIELD_MISSING error days later, in production, in somebody else’s flow. It reports, for every distinct field the template references:
- Whether it matches a real field on the bound table or a related table.
- How many times the template uses it.
- For anything unknown, a suggestion when a close match exists — “did you mean
{{account.telephone1}}?”
It understands the way Word actually stores text, so a token split across several internal runs is still found and checked correctly.
Data binding: how a template finds its data
Each template row stores a binding manifest — FetchXML naming the bound table and any related tables to pull in. When you generate from a record, that manifest is resolved against that record to build the data the tokens read.
<fetch>
  <entity name="account">
    <all-attributes/>
    <link-entity name="contact" from="parentcustomerid" to="accountid" alias="contacts">
      <all-attributes/>
      <link-entity name="task" from="regardingobjectid" to="contactid" alias="activities">
        <all-attributes/>
      </link-entity>
    </link-entity>
  </entity>
</fetch>
Each alias becomes an array you can loop over — {{#each account.contacts}}, and inside it {{#each activities}}. The Template Syntax page covers the resulting data shape in full.
Adding a related table
Edit the manifest on the Settings tab to add a <link-entity>, then revisit the Fields tab — the new table appears as its own group with ready-to-paste tokens.
alias is the name your {{#each}} loop uses.Versions and retiring a template
Templates carry a version and an active flag. Only active templates appear in the Generate document picker, so the way to retire one without breaking history is to deactivate it rather than delete it — documents already generated keep their provenance stamp pointing at the template and version that produced them.
Authoring in Word instead
The Studio is not the only way. A template is an ordinary .docx, .xlsx or .pptx file: build it in Word, Excel or PowerPoint with all your own styling, type the tokens where the values go, and upload it with Replace file on the Settings tab. Use the Fields tab to copy exact token names, and the Validate tab afterwards to confirm every one of them resolves.