Installation
This guide walks you through installing Cartographer into your Dataverse environment. Most users will be done in under five minutes.
Prerequisites
Before installing, make sure you have the following:
- A Microsoft Dataverse environment (Power Apps, Dynamics 365, or standalone Dataverse)
- System Administrator security role in the target environment
- Permission to install solutions (some organizations restrict this via tenant settings)
- A modern browser — Edge, Chrome, Firefox, or Safari
What Gets Installed
Cartographer consists of two managed solutions that install into your environment:
VerseBlocks Core
RequiredShared foundation used by all VerseBlocks products. Contains the configuration table and activation. Must be installed first.
VBCore — v1.1.2.0Cartographer
Main AppThe full Cartographer product: Component Dashboard, Summaries, Automation Map, Compass, User Guides, and Best Practice Analysis.
Cartographer — v1.1.2.0Installation Steps
Most customers install from Microsoft AppSource — search for Cartographer in the AppSource marketplace and follow Microsoft's install wizard, which resolves the VerseBlocks Core dependency automatically. The steps below cover manual installation instead, for environments where AppSource access is restricted.
- 1
Download the solution files
For manual installation, visit the VerseBlocks downloads page and download both managed solutions — VerseBlocks Core (install first) and Cartographer, currently version 1.1.2.0.
- 2
Import VerseBlocks Core first
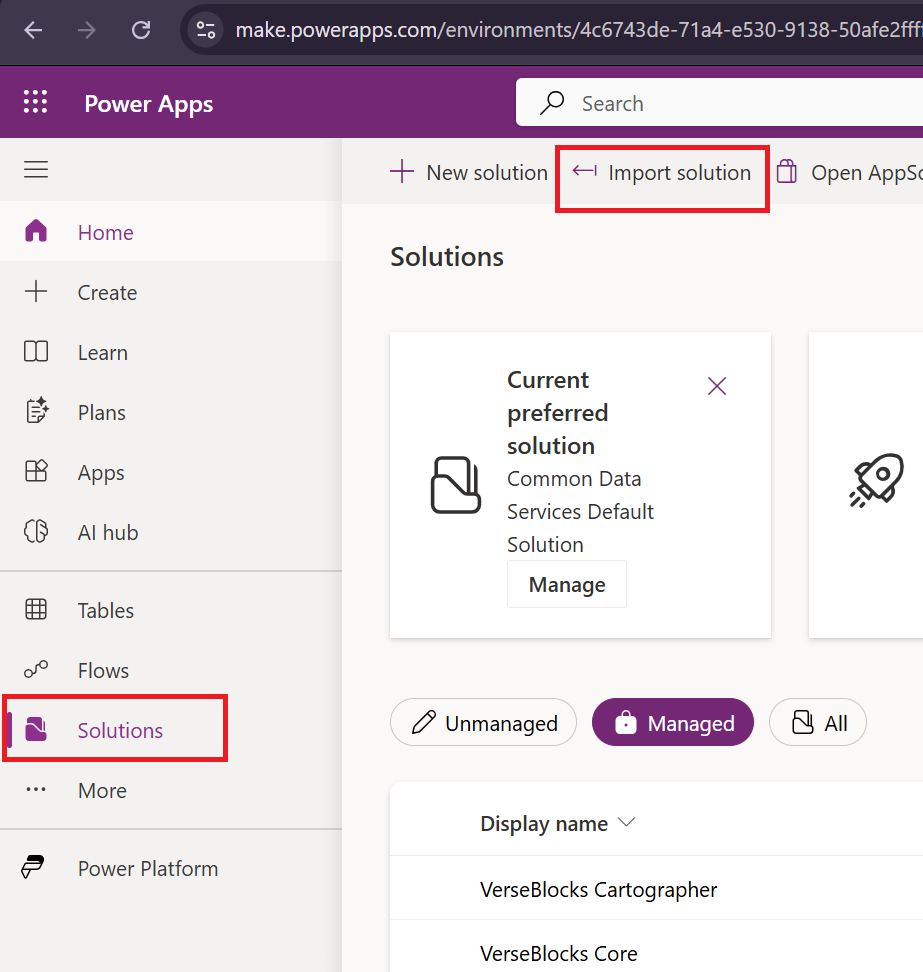
Go to make.powerapps.com, select your environment, and navigate to Solutions.
- Click Import solution in the command bar
- Click Browse and select the VerseBlocks Core managed solution file
- Click Next
- Click Import
- Wait for the import to complete — you will see a success notification
- 3
Import Cartographer
After VBCore completes successfully, repeat the import process:
- Click Import solution
- Browse and select the Cartographer managed solution file
- Click Next, then Import
- Wait for completion
Do NOT import Cartographer before VerseBlocks Core. The import will fail with a missing dependency error. Always install VBCore first, verify it completed successfully, and then import Cartographer. - 4
Publish all customizations
After both solutions are imported, click Publish all customizations in the Solutions area. This ensures all components are active and visible in the environment.
- 5
Open the Cartographer app
Navigate to Apps in the left navigation. Find the Cartographer model-driven app and click to open it. You'll see a sidebar with all pages: Solution Manager, Component Dashboard, Automation Map, Compass, Best Practices, and Activation.
Enable Scheduled Crawling
Cartographer ships two cloud flows and the connection reference they use, so crawl configurations can run automatically on their configured schedule. For every solution that uses a connection, Microsoft requires it to ship switched off with the connection unbound — only you can supply the credentials. That means one manual step stands between a fresh install and working schedules.
- In Solutions, open the Cartographer solution and find its connection references.
- Open Cartographer Dataverse Connection and bind it to a Dataverse connection (create a new one if you don't already have one).
- Still inside the Cartographer solution, find its cloud flows and turn on both Cartographer - Scheduled Crawl Processor and Cartographer - On-Demand Crawl.
Post-Install Setup
With both solutions imported and published, finish setup inside the app.
- 1
Activate
Open the Activation page in the sidebar.
- Enter your name, company name and email address
- Click Activate
That is the entire flow. There is no license key to enter and no plan to choose — Cartographer is free and every feature is unlimited. Activating registers a free licence record with VerseBlocks for telemetry; the licence key itself is never shown to you and you never need it. See the Activation guide for more detail. - 2
Add your first crawl configuration
Navigate to Solution Manager in the sidebar and click Add Solution. Select the Dataverse solution you want to document, and choose a crawl frequency. Then click Crawl Now to start discovering components immediately — you don't need to wait for the schedule.
- 3
Explore your documentation
After the crawl completes, navigate to the Component Dashboard to see every discovered component, each already carrying a plain-English summary generated automatically at crawl time. Click any component to view its details.
Upgrading Cartographer
When a new version of Cartographer is released, you can upgrade without losing any data.
Download the latest managed solution files from our downloads page and import them into your environment using the same process as the initial installation. Power Platform will detect the existing solution and perform an upgrade automatically.
Uninstalling
To remove Cartographer from your environment:
- Go to Solutions in Power Apps
- Select Cartographer and click Delete
- After Cartographer is removed, select VerseBlocks Core and click Delete
Troubleshooting Installation
"Missing dependency" error during import
This means VerseBlocks Core was not installed, or the installation failed silently. Go to Solutions, verify that VBCore appears in the list with a "Managed" status, then try importing Cartographer again.
Cartographer does not appear in the Apps list
Make sure you have a security role that grants access to the Cartographer app. System Administrator and System Customizer have access by default. You may need to assign the Cartographer Admin or Cartographer Reader security role to other users who need access — see Security Roles.
"You are not authorized" error when opening the app
This indicates a missing security role. Ask your System Administrator to assign the Cartographer Reader or Cartographer Admin security role to your user account.
A crawl configuration's schedule never runs
A crawl schedule needs the two Cartographer cloud flows turned on and its connection reference bound — a one-time step every fresh install needs, and one it is easy to miss because nothing else signals it is missing. See Enable Scheduled Crawling above.
Next Steps
Cartographer is installed and ready. Review your crawl configurations and security roles, or head straight to crawling.